Why Your Holistic Space Needs Art

Photo and design by Anjie Cho Architect PLLC

Art may not be the first thing you think of when designing your holistic space, but it actually plays a very important role on many levels. Art, by nature, is very subjective, but its effects in design are much more objective and global. Adding the perfect pieces to your home can bring your area together in various ways. 

Balance The Five Elements

We've mentioned art many times as one of the easiest ways to balance out the five elements in any space. As each element relates to a certain area of the feng shui bagua, symbolized by certain shapes, colors and subjects, selecting a piece of art can bring in one or more of the five elements. For Earth you can add earthy colors like brown, orange and yellow and square shapes. For Metal, look for metallic colors, whites, grays and circular shapes. For Water, choose the colors dark blue and black and wavy shapes. For Wood, opt for green, blue and columnar shapes, and finally, for Fire, look for the color red and triangular shapes.

Meditation

Some types of sacred art can be viewed and contemplated in meditation. For instance, the yantra mandalas are created through meditation in action but also can be a visual focal point of a meditation practice. Sacred art is often created with mantra and symbolism. I once attended and event at the Rubin Museum of Art called a "Dream Over". The museum hosts this event in which attendees are assigned a piece of art that you contemplate overnight. Participants meditate, are read bedtime stories and are invited to sleep and dream under their selected piece of art. Art can be a wonderful way to guide meditation and open your mind to inspiration and creativity. What moves you? Look for that in your art pieces.

Add Nature

While the best way to add nature to a space for feng shui adjustments is with living plants, there are times when that option isn't feasible. Maybe your thumb is charcoal black or you have boisterous pets (or children). In this case, choosing artwork that depicts nature can be a great alternative. Be sure to pay attention to the colors in your art and match them to your feng shui needs for the specific room.

Add Color Without Paint

On a similar note, there are often occasions when painting a space is not an option, such as when renting an apartment. In this case, artwork can serve as a way to add color and brighten a room without breaking terms of a lease. Images can add a healthy dose of color on their own, or you can grab a blank canvas and paint it one solid color for a big pop. 

Nurture Inspiration

Part of what makes a space holistic is that it provides nourishment and inspiration to its residents. We've even done a few posts and a podcast on how to make your space inspirational. One easy way to do this is with art. One of the best things about art is that it can be interpreted in so many ways and boosts creative thinking. Find a piece that inspires you to work toward your goals, make more art, spend more time on creative outlets, etc. 

Strengthen a Room's Purpose

I mentioned earlier that it's important to keep each room's needs in mind when selecting art. This can also be used to your advantage! In design, we often aim for a certain feeling or aura in specific rooms. For instance, the bathroom is often meant to be a place for relaxation and the bedroom for passion. Adding curated artwork can help establish these purposes. Before you look at art, take stock of what you want each room in your space to inspire and find a piece that matches that feeling!

Whether you make your own art, find art that speaks to you or commission a personal piece, bringing artwork into your space can go a long way in making a house into a holistic home. If you're on the lookout for artwork now, consider a Holistic Spaces mandala or reach out to some of our favorite artists below:

Amy T. Won
Mavis Gewant
Carmen Mensink
Karl Lorenzen

by Anjie Cho


If you’d like to learn more about feng shui, check out Mindful Design Feng Shui School at: www.mindfuldesignschool.com

The Secret to Flexible Decorating: the Picture Ledge

The Secret to Flexible Decorating- the Picture Ledge.jpg

Does this scenario sound familiar? You cuddle into the corner of your favorite chair. You pull a comfy throw onto your lap while closely hugging a cup of steaming tea, coffee or fire water. And you sigh, content and happy, until your eye rests upon that framed bit of artwork on the wall and you realize you’re ready for a change.

The good news is that the things we hang on our walls can be easily swapped out and updated for a fresh, new look. The challenge, however, can be finding a comparable piece to hang in that exact spot. Can the new piece use the same nail hole? Will it fit in the space of the item that you’re replacing? Will you need to create new holes in the wall for another sort of hanger? Do additional items need to be moved around to accommodate your new find? The more change this seemingly simple update requires, the more reluctant you may be to make it. 

Don’t worry! There’s a simple solution. Put down the hammer and don’t hang another thing before you read this. The secret to creating an easily updatable room is the picture ledge. Whether you like to replace your wall art each season or you want the flexibility to change things up on a whim, a picture ledge gives you a creative space to easily swap pieces without drilling new holes in the wall and alleviates spacing headaches each time your décor evolves. 

Let’s talk about the basics. Start by selecting the ledge length that best suits your decorating style and room size. You can find pre-made ledges in a variety of lengths or you can DIY a ledge to your specifications. If you’re going the make-it-yourself route, get creative with the materials you use. Pinterest is a great place to find inspiration and decorations for such a project. 

Generally, if you’re going to place the picture ledge over a couch, place the bottom edge of the shelf about 10 inches above the back of the couch. If you’re going to hang it elsewhere, keep in mind, you’re aiming for “eye level” artwork on a wall. A good rule of thumb is to hang your ledge 4 to 4 ½ feet from the floor. 

What goes on the ledge? For starters, there’s the obvious framed artwork. It is, after all, called a picture ledge. But don’t stop there! These ledges with their grooves and/or framed edges are ideal for displaying things like decorative plates, forward facing books, thin vases, and collectibles. Think outside the box! Hang some picture ledges in your bedroom and display your favorite shoes. Use these unique shelves in the kitchen to arrange your go-to bottles of spices and seasonings. Try a picture ledge in a child’s bedroom or play room to display those awesome Lego creations and favorite toys. Anything that will securely fit on the flat space available is fair game. Have fun with it, and the next time you glance up and realize it’s time for a change, go for it! Swap out your old shelf décor for something fresh and new without any worry.

by Anjie Cho


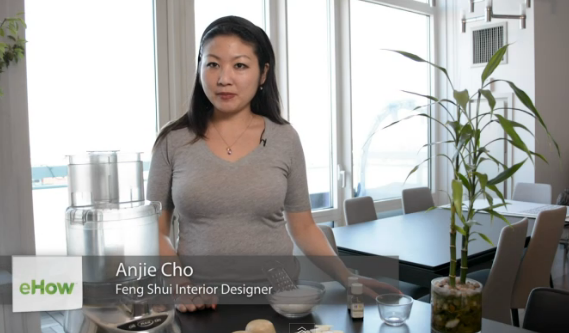
eHow.com Video: How to Use a Food Processor For Leftover Soap Pieces

How to Use a Food Processor for Leftover Soap Pieces

How to Use a Food Processor for Leftover Soap Pieces

Learn how to recycle leftover bits of soap into new, original bars using a food processor

see more eHow.com videos here

Video Transcript:

I'm Anjie Cho, and this is how to use a food processor for leftover soap pieces.

I love using bar soap, especially super nice, natural soap. Bar soap is more eco-friendly because you can use less of it and it lasts longer. And you don't have the disposable containers. But you do end up with those leftover soap pieces. I'll show you how to recycle your leftover soap pieces using a food processor.

First, you need a processor, some leftover soap pieces, a saucepan, some oil and a soap molder of some sort. First, grease your soap mold, mine is a glass bowl. You can also use a fancy soap mold or a paper cup.

Second, place all your leftover soap pieces in a food processor and pulse until you have grated soap pieces. Place these in your pan over low heat with just enough water to cover. Here's where you can get creative and use milk, tea, coffee, water, it's up to you.

Milk can give a creamier, moisturizing soap. Different herbal teas can add the benefits of the herbs. Such as peppermint, which is tingly and invigorating. Coffee and caffeinated teas can help wake you up and make your skin firmer. And then, there's water for the purists.

Once you have a smooth texture, take your mixture and let it cool a bit. After it's cooled to the touch, at this point you can add other things such oatmeal, coffee grounds. etc. And you can add some scrubbing power. Or you could just add some essential oils.

Pour it into your mold and cover it with plastic wrap. You can leave it out or put it in the fridge. When it's set after a few hours, you can take it out and let it cure, meaning dry and harden for at least a week. Maybe longer if you used a lot of liquid.

This is a great way to use leftover soap pieces and make a special bar that's all your own.

by Anjie Cho