An Introduction to Using Color in Feng Shui - Part 2

Last month we talked about how important, and increasingly popular, the use of color psychology is in creating a holistic, sacred space for each of us. By now, you know when it's best to use greens, teals, blues, purples and violets, yellows, oranges and browns. As many colors as that may be, it's just the tip of the color iceberg! 

Let's take a look at a few more colors and what they symbolize in feng shui. 
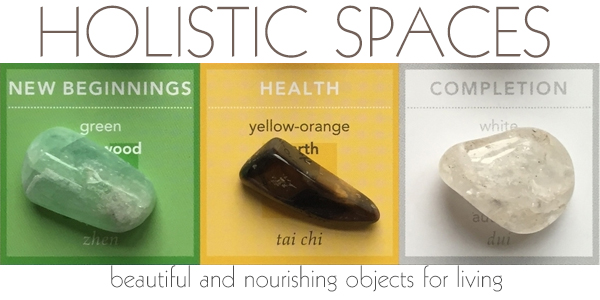
Whites

Not surprisingly, white symbolizes purity and simplicity. This color is very bright and stark and is the ultimate yang, or active, color.

White can represent an empty slate as well, but it's important in design to view it as just that, since it can be so harsh on the eyes. Imagine looking out at a field of fresh, clean snow. Think of how that bright, empty color puts a strain on your eyes. Who wants to be constantly blinded in their own space?! 

To utilize this color in your space, use white as accents in areas with more color or opt for warmer, off-white tones for wall colors. 

Grays

Gray shades offer the ultimate balance, as a combination of black and white, yin and yang. They can, however, be a bit depressing and cold for some, especially those already dealing with mood issues.

Despite this possibility, grey is a great color to use in your spaces, as it attracts helpful people to your life and helps support the intentions of other colors in a space. 

To use grey in your home or office, consider adding the color to the Benefactors area of your bagua map or combining shades of grey with a complementary color scheme

Deep, Dark Blues

Since there are a plethora of shades of blue, it's necessary to note a difference between the healing, yang energy of brighter blues and the supportive, meditative, more yin energy of dark, deep blues. 

Since very deep, almost black blues are related to the Water element and the Knowledge area of the bagua, they represent a sense of calm and security and can offer a sense of settling and quiet. 

Though blue generally represents the Wood element, these darker shades of blue are perfect for meditation spaces, bedrooms (as long as you don't have a mood disorder) or anywhere you can use a little Water element. Look for artistic accent pieces or accent walls, since you don't want to go too dark with an entire room.

You can also place a piece of Lapis lazuli crystal in the Knowledge or Completion area of your bedroom for support with self-expression and growth.

I hope you're getting a good idea of what colors are best for your space and which ones will nurture you most! Check back in next month for another dose of color 101, where we'll finish up with passionate shades of red, blacks and, on a lighter note, pinks and peaches!

by Anjie Cho


Sagging Sofa? Refresh Rather Than Replace.

There’s a time in every day when you want to kick off your shoes and sink into the welcome embrace of your favorite seat in the house. Over time, however, the well-loved and much used couch can show its age. If your once plump and lush sofa is looking more squished and sagging, follow these six steps to bring new life into your favorite seat. 

1. Snap a photo of your sofa.

While it’s always fun to admire your work with a good before/after visual, that’s not our goal here. Having a picture will help you reassemble the couch properly when you’re done. And if you’re going to spice things up with a few new throw pillows, having that snapshot for your designer or with you in the stores will come in handy, too!

2. Remove the seat cushions from the sofa.

The cushions likely have a zipper on the side that faces into the couch. Remove the covers. This is a good time to wash those! Just make sure you follow the directions on the tag. Go the eco-friendly route and air dry the covers outside. While you’ve got everything taken apart, vacuum the foam cushions and the base of your sofa. 

3. Inspect the frame of your sofa.

Is it in good shape? Are the springs looking worse for the wear? You may find the bones of your favorite coach are beyond your abilities to repair. If that’s the case, it might be time to find a new love. However, if the frame just needs a little TLC, one option is to place a sheet of plywood over the base of your seat. This will create a new platform for the cushions to sit on. Cut the platform to fit the base properly. Once you put your cushions back into place, you’ll never know the wood is there. 

4. Plump your back cushions up. 

Use Poly-fil batting and/or quilt batting to plump up the back cushions of your sofa. If the back cushions don’t come off the frame of your couch, they may still have a zipper at their base. That’s when you reach for the Poly-fil. Tuck generous handfuls of fill behind the existing pillow or foam. If you need help, use a ruler to get the stuffing into the corners and edges. Fill each cushion until you achieve your desired level of plump and comfy

If you can remove the cushions, wrap the foam with layers of quilt batting. Use spray adhesive to help hold each layer of batting in place. How many layers? That depends on how plush you want your seat and how much space you have between the existing cushion and the seat cover. You want your revitalized cushion to have a tight fit, but it still needs to get in the cover. 

5. Reassemble your sofa. 

Place the now clean and plumped cushions back into place. If you have any extra Poly-fil, freshen up your throw pillows before you place them back into place. Or take your sofa photo shopping, and pick up new throw pillows or fabric to make your own covers for the existing pillows.

6. Kick off your shoes and sink into your renewed, refreshed, favorite seat!

by Anjie Cho


The Sticky Secret to Painting Straight, Even Edges

You’ve spent time looking at paint swatches. You’ve hung your homemade poster board-sized samples on the wall, and then moved them to check your hue from various angles. You’ve spackled, sanded, and repaired. You’re armed with rollers and brushes and you’re ready to give your room new life with a fresh coat of paint. Right? Wait. There’s one more thing you need to do to paint like a pro: Tape. 

Let’s talk about this painter’s staple for a moment. A bit of magic, tape will ensure you get paint where you want it and not where you don’t. If you want clean, straight lines, you need to tape off your borders before you get started. 

The right stuff

Don’t rack your brain trying to figure out what you have at home already that might sub for the roll of tape in the paint department. If you don’t have a roll of this specific stuff, you’re going to need to buy one (or more). Painter’s tape is low-tack, which means it will go on and peel off without leaving sticky residue on your walls and trim. It also won’t pull away the finish you wish to keep. There are different tapes suited for specific surfaces. Read the label or ask the paint shop staff for help in selecting the right roll for your job. For example, you’ll find tape designed for multi-purpose use, as well as tape specifically designed with delicate walls in mind (think fresh dry wall or newly painted). To get off on the right foot, pick the tape that’s best suited for your job. 

Prep the wall

Before you stick the tape anywhere, take a damp sponge and wipe down the wall and trim. Let the surface dry before you proceed. The best painted walls start off clean, dry, and dust-free. 

Go long

You may think it’s more manageable to pull off several inches of tape and apply it to the surface you wish to protect. Not necessarily. Every juncture point is an open invitation for paint to seep through. On the other hand, you don’t want to peel off a huge swath of tape all at once. Work with 1 to 2 foot sections at a time. Be sure to overlap your tape segments to limit the aforementioned invite to seep. Don’t go too long, however. Pulling off large sheets can create sticky tangles and ineffective, overstretched tape that won’t lie properly. This would invite paint to bleed past your tape border as well.

Smooth it out

The goal of taping is a clean, sharp line. Make sure the tape lies flat at your border line. Press it down with your fingertip or a putty knife to secure the edges. 

Base coat it

To really seal the deal, use your brush to lightly paint a thin strip of your primer or wall color along the edge of your tape. 

Take it off

If you wait for your paint to fully dry to remove your tape, the paint may chip and create uneven lines. Start pulling your tape off when you put your brush down from the last swipe of color. Pull down and away gently at a 45- degree angle. If the tape isn’t peeling back cleanly, adjust your angle to 90 degrees and enlist the help of a sharp tool to cut (or score) the layer of paint between the finished wall and the tape you’re pulling away.

by Anjie Cho